Written by Jennifer L. Sturm — Chief Operations Officer
Empire Bolt & Screw Inc.

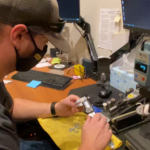
Mason Smith, examining the plating surface under 100x magnification at Empire Bolt & Screw’s Quality Control Lab. Smith is the company’s account manager and a QC technician.
Successfully working in the fastener industry entails ongoing learning, even for experts in the field. Case in point: a recent learning experience was on plating adhesion.
Plating is a thin layer of metal bonded or fused at the molecular level to the fastener. Depending on its purpose, plating can alter a fastener’s appearance, hardness, electrical conductivity, or ability to withstand corrosion or wear.
There are several types of plated coatings available, including zinc, phosphate, chromium, nickel, bronze, brass, and many others. In this case, type 260 brass fasteners with nickel plating per ASTM B733 SC1, Type III were in production. Nickel plating provides a unique combination of wear and corrosion resistance, including visual appeal.
The problem was that a plating process change occurred without verification. The reason: the screw manufacturer moved plating facilities to meet the customer’s production deadline. Although this plating facility indicated it could properly plate the screws to specification, no testing was performed to confirm the plating or qualify the new plater.
Manufacturers rely on different tests to ensure the reliability of their fasteners. For example, salt-spray testing is common. The coating will typically indicate the minimum hours to rust when tested in a salt-spray test. There are also plating adhesion tests to ensure the coating does not peel or flake. Additionally, it’s important to ensure the plating provider’s equipment and process standards also meet quality requirements.
For this project, everything seemed fine at first. Dimensionally, the plated parts conformed to print, and their appearance was nearly identical to previous lots. However, during installation, these parts proved faulty due to plating adhesion failure. The nickel flaked off when installed in the application.
Flaking can occur for a few reasons, including inadequate surface treatment, incorrect coating thickness, or interruptions or errors during the plating process.

Gaging threads with a tri-roll gage — specifically, the functional diameter.
This customer’s print called for a nickel-plated brass fastener that would be inserted into a mating threaded terminal and then installed into a terminal block. The process also employed automation, so there were a lot of considerations to examine to find the root cause of the failure.
Through a process of elimination, the terminal, block, and automated processes were eliminated as the cause. Following the results from the XRF scan, there were two contributing factors that led to the plating failure.
1. The electroless nickel plating was not to spec. It was less than half of the required thickness. All documentation indicated that the plating process was followed according to the standard, but under XRF, it was clear that the plating was insufficient. (XRF is an X-ray fluorescence spectroscopy that determines the elemental composition of materials.)
2. A copper flash was used to help the electroless nickel adhere to the part. However, on all lots that pre-dated the rejected lot, a nickel flash was used instead of copper.
Finding the right test
The next challenge was finding a method to ensure the adhesion of the plating on subsequent manufactured lots would be described on the print.
Within ASTM B571, appropriate adhesion test methods are indicated for a variety of coatings. ASTM International, formerly known as American Society for Testing and Materials, is an international standards organization. For nickel plating, there are 11 test methods.
The bend test was considered at first, but there was no way to adequately bend these parts around a mandrel to achieve accurate testing results. Next, the Heat-Quench test method was used as it’s non-destructive. The test subjects electroplated parts to elevated temperatures, determining the sufficiency of coating adhesiveness.

Amanda Lundberg, a QA trainee, is setting up the comparator for fastener thread inspection.
At first, the plating passed with no visible blistering to indicate inferior adhesion. Unfortunately, the parts failed in the application and plating flakes were found after removing the fasteners from the terminal.
A more reliable method was necessary, ensuring the parts functioned properly in the application. Even ASTM places a disclaimer on the “precision and bias of these tests, because of their qualitative nature” (ASTM, 2013, 15.1). In other words, the results of the tests can be open to interpretation.
Ultimately, this customer specified the plating process must contain a nickel flash, and the parts must be plated with the full thickness of .0002 nickel (per ASTM B733 SC1, Type III or Type IV). The testing methods accepted must also meet Class 1 for adhesion (ASTM B571 verified) or Class 5 (heat treating) per ASTM B571.
To ensure conformance, additional testing with an XRF device will be employed to ensure an adequate deposit of nickel. Documentation will be provided with each plating batch within each manufactured lot.
So, what was learned overall? Although conformance is critical, it’s also wise to build strong, supportive relationships in the industry with those who are available for consultation. Even with the best of intentions, errors and unexpected events occur. It’s also essential to keep learning.


Tell Us What You Think!